Friday, August 31, 2018

Oh So Lovely


Here is a very pink layout! It's a simple layout based on a Scrapbook Generation sketch which I've used many times before, but the look changes depending on your papers and embellishments. I know that this was a favorite picture of Jim's so I wanted to make it stand out in a special way.


Scrapbooking Tips:
 On a simple layout I like to keep my embellishments clean. To add some visual interest I added the photo with foam adhesive to add dimension. I also used foam adhesive on the title sticker and phrases and overlapped them on the photo. So the phrases were easy to read, I positioned them over the solid square so a pattern didn't compete the words. I strategically placed the title sticker over the dotted paper for continuity because it was circle and mimicked the dots.


This is a favorite design of mine and I've used it many times. Do you recognize it now?


Thursday, August 30, 2018

Cards from the Sea - Part 3

I am having so much fun creating shell/sea themed cards with all my Stamps of Life supplies! Here are three more I created using the shells2stamp, fish2stamp, Under the Sea Class stamps and their coordinating dies. I also gave my stamped images a water colored look by using my water based markers and a water pen. 


Wednesday, August 29, 2018

Alexis & Yukon


Alexis had a very special friend – Yukon. When Jim and the girls came into our life, Yukon was old, and while we didn’t get to spend much time with him, the incredible relationship between Alexis and Yukon was undeniable. Yukon passed away in December of 2016, and that was hard to watch Jim and the girls grieve for their friend.

I spent a lot of time on these layouts because I wanted them to be special for Alexis. When God brought us together, she was a senior in high school and left for college right before Jim and I got married. I think we have a phenomenal relationship and I’m very blessed to call her my daughter, but I know I don’t get to spend as time with her as I do Alyssia. I wanted to make sure I’ve added some special layouts to make sure she knows how much she is loved!

When I saw these pictures of Yukon and Alexis I knew I wanted to document their friendship. I had purchased Doodlebug’s Puppy Love collection for just this purpose and set out to make some layouts.


Dog Days Scrapbooking Tips:
On Dog Days I let the sticker be my title. I adhered it with foam adhesive to give it dimension and placed over the picture I wanted to be the focal point of the page to draw your eye there.

I cut circles out of paper scraps using my Sizzix Big Shot and dotted circle dies from The Stamps of Life. I let the circles overlap the ends of the page.

The hearts were the most time-consuming part of this layout. There was only a handful of heart stickers on the sheet included in the paper pack, but there was a sheet of patterned paper that was just hearts, so I took scraps from that design and hand cut each heart. I really wanted to emphasize the love between Alexis and Yukon so that’s why I took the time to add a heart to each circle versus paw prints, bones, etc.


Me & You
I wanted this photo to get its own page. I also felt the colorful word stickers from the paper collection better expressed the emotion in the photo than any journaling I could add. To give this layout some extra special attention, I did hand stitch around the 8x8 square that anchors the focal point.

Tuesday, August 28, 2018

FAQ - How Many Albums Have You Filled?


I’m often asked how this question and I sheepishly answer that I have averaged five albums a year since 2007 – the year I became a mommy! Every major milestone, cute story, and precious memory of my boys' and now step daughter’s life is lovingly chronicled. This is what happened when you have an absolutely addicted scrapbooker who gets much enjoyment and therapeutic rest from paper crafting!

My album system is simple – after much trial and error! I prefer to use three-ring albums for the ease of adding pages. I pick a color for the year, and then order five or six albums in that color when Jo-Ann’s has a 30% off sale and I have a coupon code for free shipping. I use We R Memory Keepers Albums to keep a consistent look, and they also are a reputable company that has endured the test of time and make quality products. Another feature of these albums I like is the tab on the spine where you can add information.

When I go to pick the next year's color I try to coordinate with the previous year.
No one but Alyssia and I have opinions on the matter, but it is something we take very seriously! :)

Once the albums arrive, I stamp the year on the tab insert and add a sticker to represent the season. I’ve found that this system helps me keep my albums in chronological order. However, I quickly found that I overflowed the four albums by the time I added all the fall, Thanksgiving and Christmas photos. So I added a fifth album devoted to holidays / holiday preparations. 


The year we went to the Cure SMA Conference in Disney World I filled two albums!

What about vacation albums, you ask? For some reason, I typically scrap out of order which makes having albums kept chronologically so important. This way when I find adorable pictures of Zach from 2011, I can make the layout and easily slide it into place, but when I scrapbook our vacations I like to finish the album start to finish to keep some continuity. Lately, our vacation pictures fill two albums so I might mark the vacation album 1 & 2.

Jim had these shelves specially made to hold the weight of the scrapbooks. This was taken in 2017 and I've added many albums to them since! I figured, with the space I have left, and at my current scrapbooking rate, I have enough shelf space left to go through 2026 - but you never know!

I know, I’m crazy. I’m obsessed, but this hobby is important to me. It shows me smiling children in spite of the horrific pain they’ve lived through at young ages. It shows me the smiles outnumber the tears. It reminds me that God has a good plan for our lives. It helps me count my blessings and say with confidence, “God is good all the time!”

So how many 12x12 albums have I filled? As of August 2018 the count is 91 albums!

Monday, August 27, 2018

Cards from the Sea - Part II


I absolutely loved the shells2stamp set and coordinating dies from The Stamps of Life, and I had to show some of the creations I came up with . . .


The mermaid2stamp set and dies are too adorable not to use with the shell pattern paper and so I came up with this little lady birthday card. (It always so much fun to add glitter and rhinestones to pink paper!)


For this card I used a supply I don’t typically use – Sizzix transfer paper. You place transfer paper (which is more like a film) between your die and paper and run it through a die cutting machine and instead of cutting it imprints the design. How cool is that?! 

I like the natural look of the tan and white and had a lot of fun putting this card together – and you can never go wrong making a flip-it card. (If you don’t know what a flip-it is, you have to check out The Stamps of Life videos!) 


And last but not least, I played with my markers and water pen again to create these water color shells. I love the soft feminine look of this card. I didn’t set off to make a soft card, but the end result was perfect!


If you enjoy stamping you really need to check out The Stamps of Life! There products are reasonably priced and of exceptional quality. I also have had the opportunity to meet the designer / owner Stephanie Barnard and have been so impressed with her. Her products are so fun, easy to use and look great on scrapbook layouts or cards! You can learn more at thestampsoflife.com.


Friday, August 24, 2018

Agent P


These are the layouts I enjoy making - remembering the cute quirky things my boys did when they were little that would otherwise be forgotten over time. Zach loved his Perry the Platypus hoodie, but he stole Caleb's Indiana Jones hat (which Caleb insists on calling a fedora) and came to show Dave he was Agent P from Phineas & Ferb. For months afterwards, whenever Zach would wear this sweatshirt he would go looking for the fedora. 

On an unrelated note, we ended up buying Zach his own fedora that Christmas. . . we were starting to have to settle fights over which boy could wear it when!

Scrapbooking Tip:
I'll admit - I debated whether or not to share this layout because the photos were not great. Zach's eyes are closed in two of the three pictures. One photo was zoomed in, but the best photo was not. I almost didn't scrapbook these pictures at all. BUT, that sweatshirt and hat were a big deal to Zach in 2012! He spent lots of time dressed up as Perry the Platypus, but these were the only photos. In my Disney mega pad of paper there was even a Perry sheet of paper, that's how popular this character was when my boys were young! So closed eyes or not, to this mommy, the pictures were deserving of their own layouts. Don't think you can't scrap less-than-perfect pictures. If they're important to you and tell a story, they definitely belong in a scrapbook!

Thursday, August 23, 2018

Happy Birthday, Zachary!


Today my precious Zach Attack turns 10! My baby is officially double digits! So in honor of him, I'm sharing a couple layouts from his 9th birthday. I don't think anyone can call themselves a scrapbooker and not capture their kids' birthday in one, two, three or more layouts! If one of the kids' birthdays falls on a weekday, they will get to open a present from us and they get to pick where we go out to dinner that night. Then on the following weekend we invite family and maybe a friend or two to celebrate. It extends the festive mood a little and that means I not only have the party pictures, but pictures from their actual birthday. Do I scrapbook them all? Yes, I do. Am I crazy? Yes, I am. 

Once again, I used a sketch from Scrapbook Generations to make this layout. I find a sketch helps me incorporate many pictures but not sacrifice on any of the design details. I picked bold colors to keep it bright and cheerful. Simple Stories Let's Party collection was a perfect fit. Sticking with a single paper collection helps me scrap faster by having everything I need in one place. 

Journaling Close Up:


Scrapbooking Tip:
I love the look of banners, but I'll be honest, I can't quite get them to turn out right. When I saw these banner stickers I immediately knew I wanted to use them as my page title. I attached them to the layout with foam adhesive to lift them off the page, and instead of placing them side-by-side I "stacked" them to keep them centered on the banner strips below them.


This is a quick layout of Zach's birthday dinner at the Chinese Buffet. Does he like Chinese food? No, not really, but you can get chicken nuggets (sweet & sour chicken without the sauce) AND red jello cut into squares! An added bonus in Zach's estimation - you can get your own food without having to wait for them to take your order. . . .

I used paper scraps from the previous layout and added a few epoxy dots to embellish the page. Sweet and simple, but birthday dinner documented!

Wednesday, August 22, 2018

Girl Time


Have I mentioned before I love having step daughters so I can FINALLY scrapbook some girly layouts? This layout was one of the first I made of just Alexis, and Alyssia and me when we were getting pedicures. I had taken a picture of the two of them and Alexis told me to do a selfie so I could be in the picture too. My heart melted a little when I realized that they wanted a picture of the three of us. So here it is . . . our first "spa experience" recorded for posterity!

Scrapbooking Tips:

I loved the background paper with the bold vibrant hues, which just happened to be some of the girls' favorite colors so I wanted to make that the focal point. A simple title and flowers to embellish and draw the eye around the photos completed the look. Sometimes even moving the title to the right margin of the page can be enough to change the look. I thought the page looked a little too "heavy" with the title on the left.

I have to remind myself that while I like to journal to remember the small details, not every layout needs an explanation. If I don’t journal, I like to at least date the back of the layout so I know which album to put it in.

Tuesday, August 21, 2018

Medieval Times


These pages capture a fun memory from our Baking Memories for Kids Florida vacation. While we were staying at Give Kids the World Village we had a list of local attractions that would give us a complimentary experience, and Medieval Times was on the list. We had to drive past the huge castle (complete with draw bridge!) on our way to Disney and the boys, especially Zach, were mesmerized, so we signed up to dine there on our last night in Florida.

It was an amazing experience! My aunt and grandparents were able to join us for dinner which made the evening even more special. We were seated and not given  utensils, to keep it authentic to Medieval times. Then we were put in the Red Knight's section and instructed to cheer for the Red Knight. Well, Zach did not like the color red, and insisted on rooting for the Green Knight, because green is his favorite color. This did not sit well with his rule following older brother, who continued to cheer for red.  Wouldn't you know, the Green Knight won!

When our waitress saw the Give Kids the World Village tag that Caleb was wearing, she brought us downstairs after the show to meet some of the knights - and the ones available to meet and greet were the Blue and Green Knights.

I will admit, I didn't watch too much of the show because I was too busy watching the boys just soak it all in! They cheered and hollered and booed along with the crowd. They laughed and smiled and enjoyed every minute of it, and I enjoyed them.

Scrapbooking Tips
I did not design every layout I used for my Medieval Times layouts. I subscribe to Scrapbook Generation's Boy Crazy kit club one month they used Echo Park's Once Upon a Time Prince Collection which was a perfect match for these photos! So I purchased the paper collection to make additional layouts. This is one of my favorite paper collection because it fits with Zach's personality perfectly and I've been able to use it many times.

Layout designed by Allison Davis for Scrapbook Generation Boy Crazy Kit Club

                
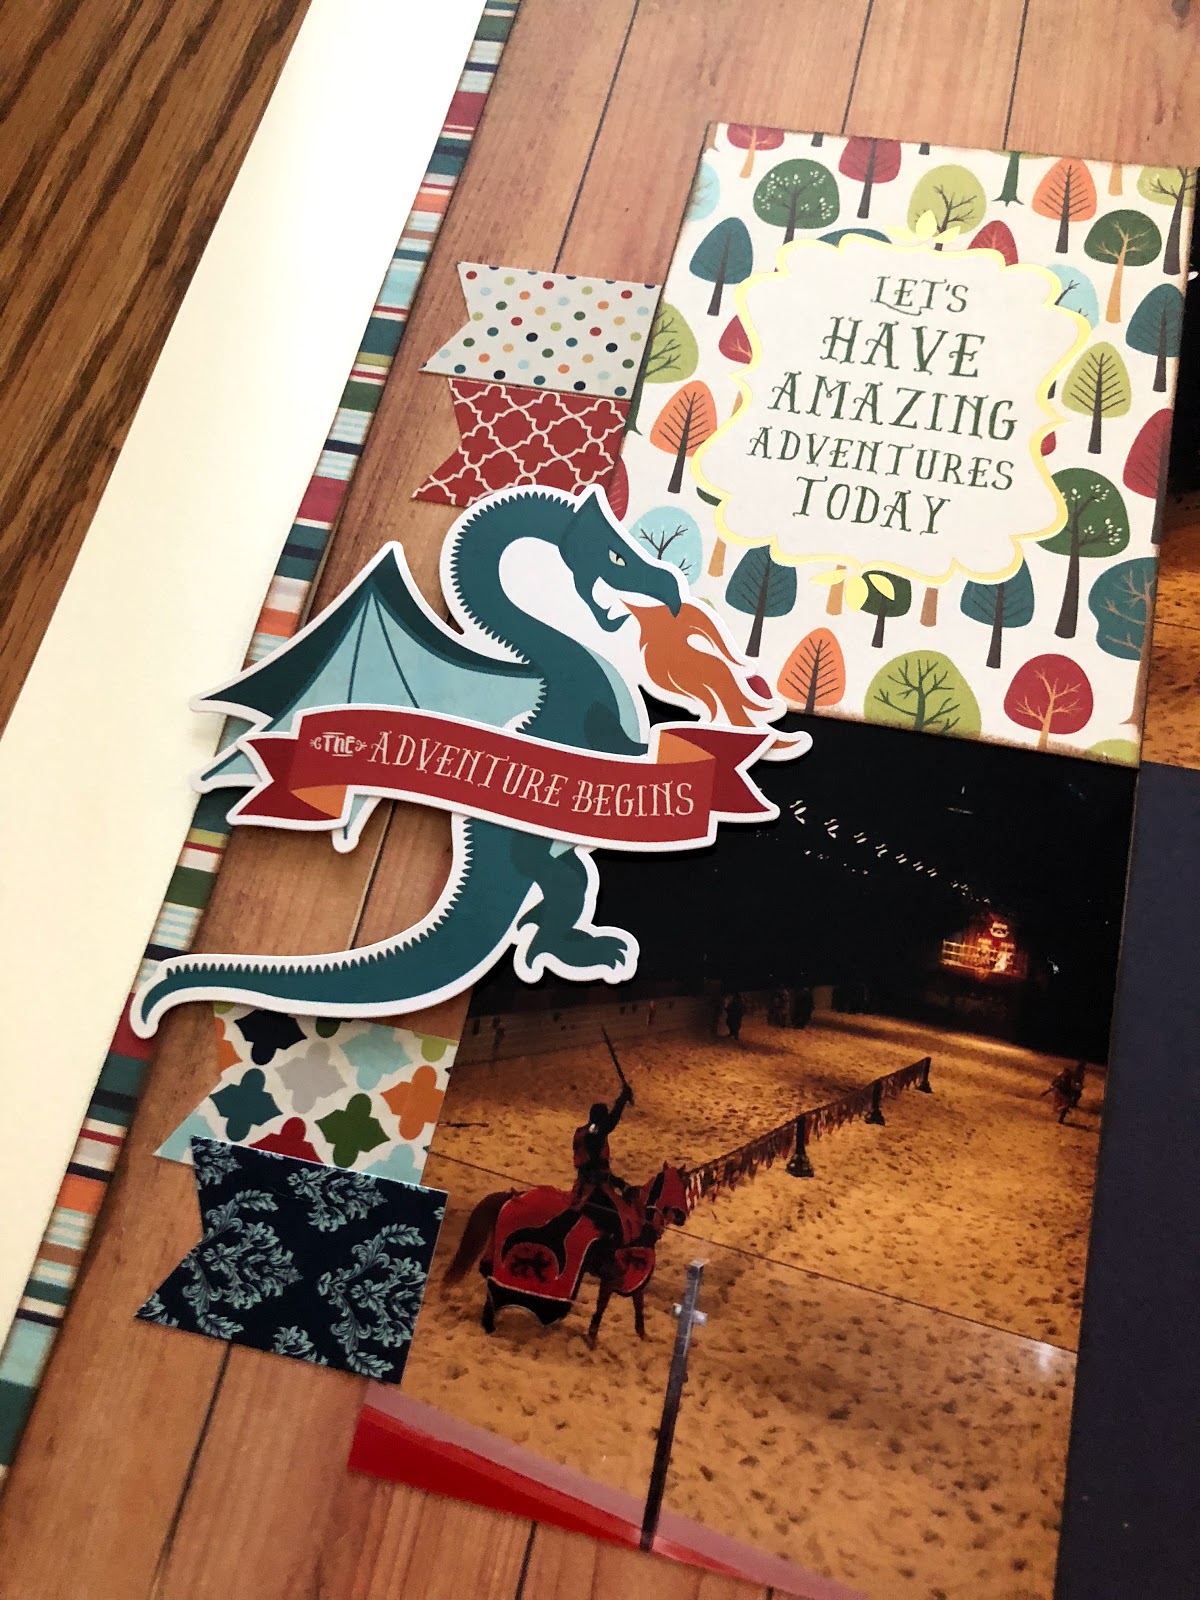
                 Following Allison Davis' instructions, I
                  attached the dragon stickers with foam adhesive.

                      
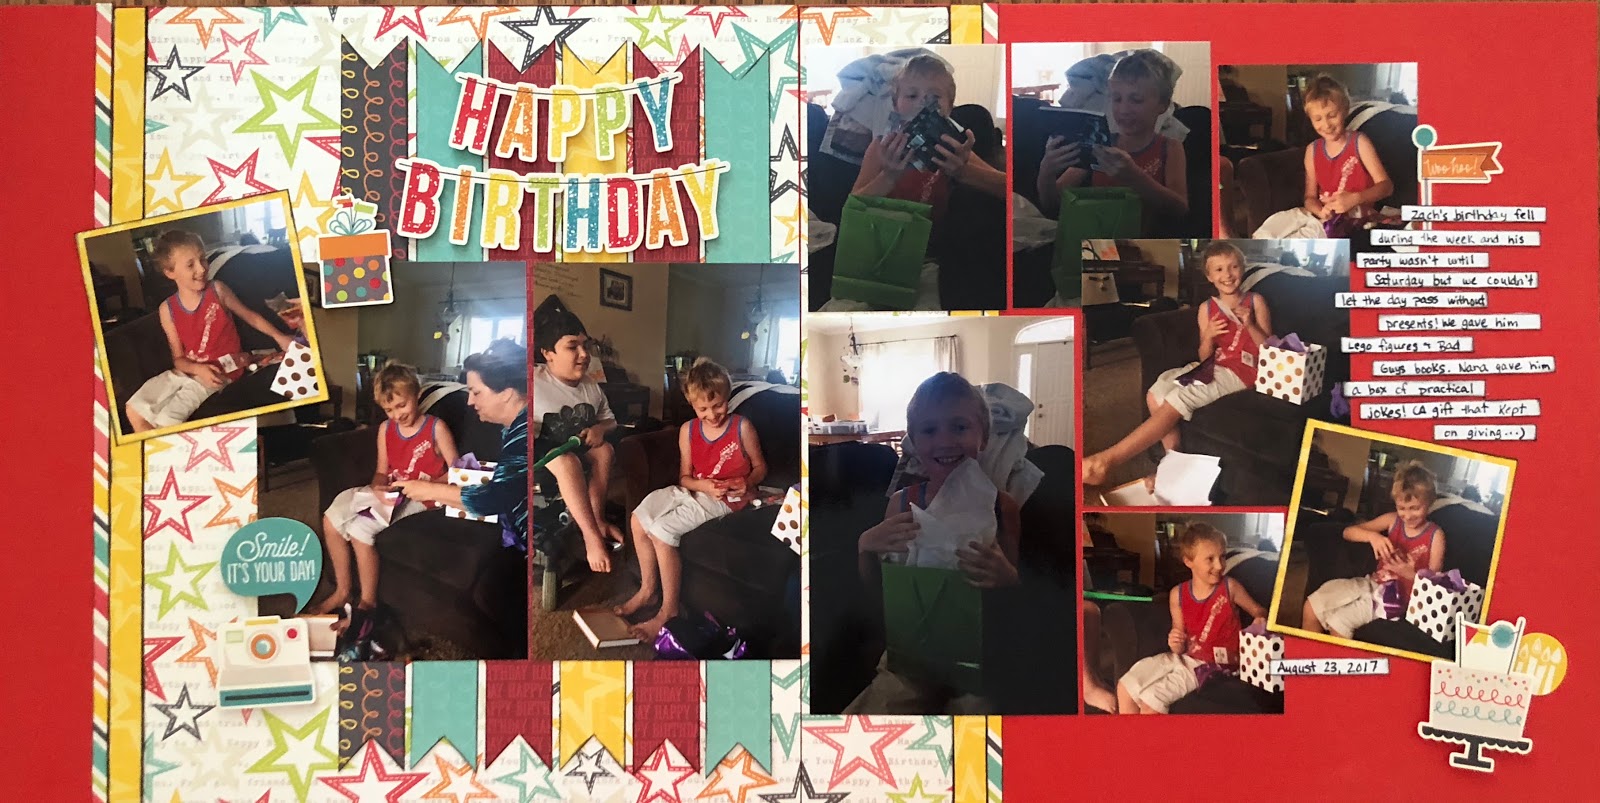
                             I like the combination of the small photos with 4x6 photos.

I loved Zach's expressions and enthusiasm and Caleb's quiet study of everything.
My boys are polar opposites and these photos reflect that.

The boys meeting their favorite knights!
For this layout, I took scraps of paper left over from the other layouts, over lapped them and tacked them down. I used 4x6 and 6x4 photos so no cropping was involved and added a large sticker with dimensional adhesive to embellish the page. No title, no journaling and I absolutely love this layout!


Saturday, August 18, 2018

Cards from the Sea


I’ve had some fun with the mermaid and shell stamps from my all time favorite stamping company - The Stamps of Life! I’ve been wanting to play with these stamps for a while but I had to make these cards in stages.

I’ve been taking online classes from Stephanie Barnard and The Stamps of Life, and I finally learned how to use water pens to get a watercolor look on my cards. Following Stephanie’s instructions, I stamped my images with her black archival ink, and then using water based markers went to work filling in the color. I’ll be honest - this was a new skill for me and one that did not come naturally! There was a lot of trial and error. I’m still on the learning curve but was pleased with how these images came out (especially the jelly fish). 

After I colored the images the paper had to dry before I could add them to my cards - but it was worth the extra time. I can’t wait to experiment with water colored images in the future.


Wednesday, August 15, 2018

Fun & Funky Flamingo Note Card


Hello!
I have been busy playing with all my Stamps of Life Card Kits! When I feel creatively challenged I take a break from scrapbooking and love making cards. It's easier to experiment with new techniques, colors, and patterns when working on a smaller scale. I also love pulling out stamps and inks that I haven't used in a while.

That was the case with this card. I had the flamingos2stamp and dies that were collecting dust. I die cut the palm trees and used a flamingo I had previously stamped and cut. I also had an ocean colored A2 size card base that had been sitting in my stash. When I was trying to arrange them my card front, I couldn't get the placement "just right". 

I pulled out the border dies I had just ordered and used them to die cut the front panel of my card. I adhered the palm trees on the "inside" of the card, letting them hang off the base a little, and then used a pop dot to adhere the flamingo on the front to add dimension. I stamped "Sending Sunny Smiles" and added some epoxy dots - and my card was finished. I loved the simplicity and the 5 minutes it took to put this together. Not a masterpiece, but a fun way to send a note to a friend. 


We Love Candy

Who doesn't love candy? My kids have inherited their mom's sweet tooth. Although, as I've matured I forgo the sour patch kids...