Sunday, June 16, 2019

Father's Day


In recent years, Father's Day has been a painful day for the boys and I as it tends to highlight Dave's absence. There's nothing I can do take away the boys' pain, except maybe a few extra hugs and a shoulder to cry on. However, since God brought Jim into our lives, we have a reason to really celebrate again. These photos are from our first Father's Day with Jim. The first of many celebrations as a blended family. 

One thing that I am learning as part of a blended family, is that holidays can trigger or exaggerate emotions that lurk right under the surface. Not only for the boys and girls, but even for Jim and me. While we are happy that we all have each other, there is pain because this is not how any of us originally pictured our life.

While we do not have this whole blended family thing perfected, one thing that amazes me is how God's grace is so evident in how our kids respond to each other on these special holidays. For example, today, Father's Day 2019, Alyssia used her own money to buy flowers for the boys to place on Dave's grave. On holidays where the girls have to split there time between mom and dad, the boys are genuinely willing to wait to celebrate until the girls have arrived. 

So today, we celebrated. The girls celebrated their father and the boys celebrated the memory of their dad and the awesome step-dad they have. We laughed and cried (a little!) but most of all, recognize the blessings of a heavenly father who made us a family and is faithful to continue to knit us all together with every new memory we make!

Scrapbooking Tips:
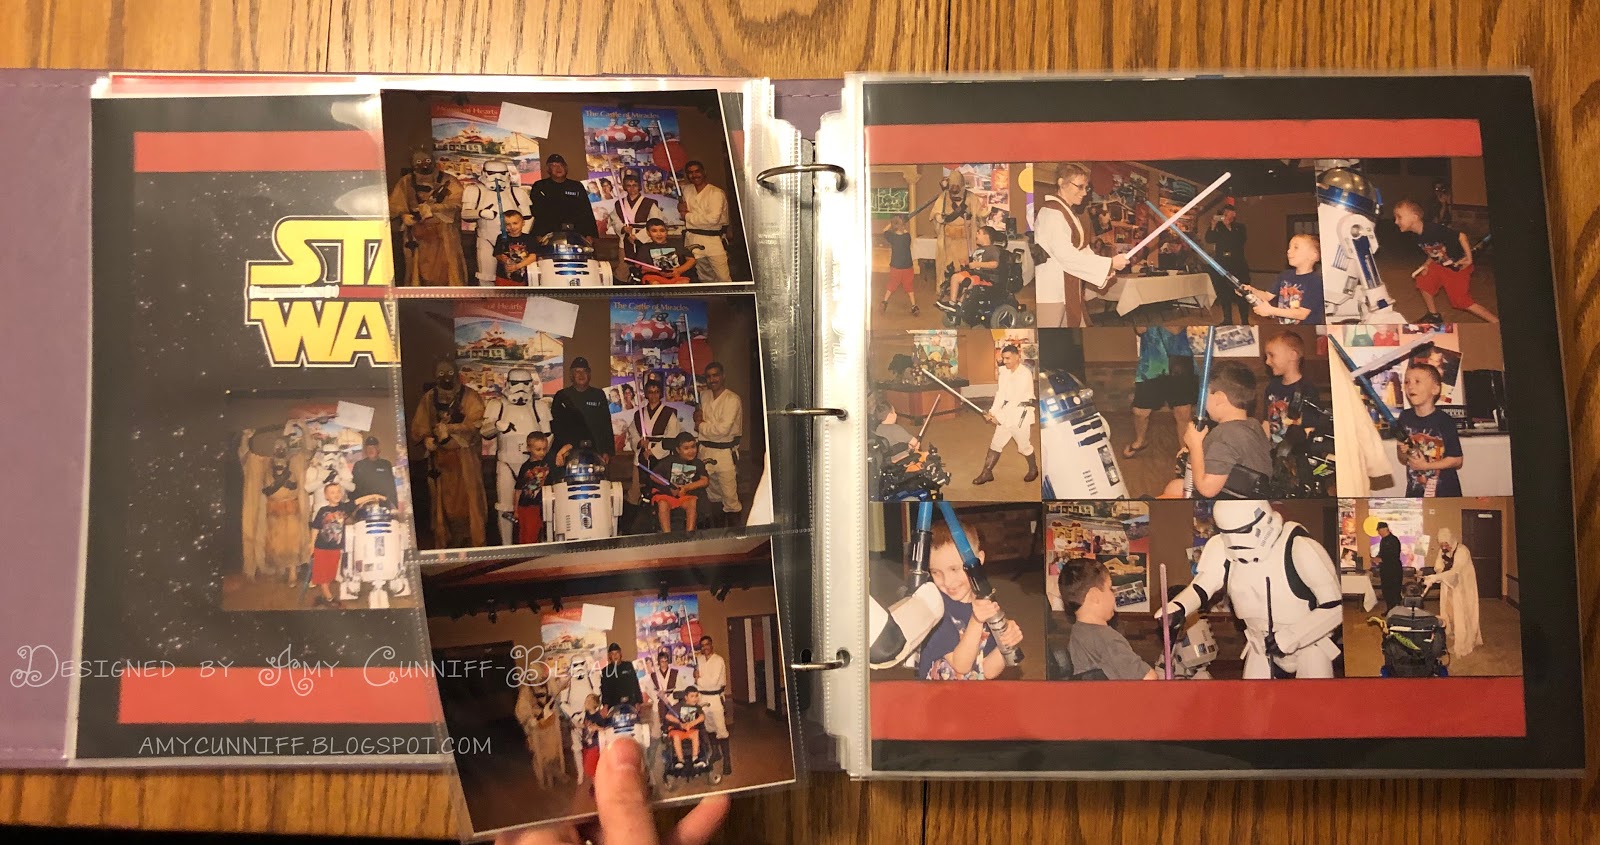
I wanted a masculine looking layout and didn't have any other photos than the ones of Jim opening up his presents. My solution was to create a grid layout. I loosely took this idea from a Scrapbook Generation sketch, but had to adjust it because I did not have a lot of photo options to work with.

I used 6x6 pattern paper from The Stamps of Life to create the background and banner detail in the upper right corner. I was happy to have this Father's Day documented and the bright, cheerful look to the layout!

Friday, June 7, 2019

Reptiles


I need to start this post with a disclaimer - I absolutely, positively HATE reptiles, especially snakes. I've told my boys that I will never allow them to own a pet snake, and most likely nothing from the lizard family either! However, my boys don't seem to mind snakes or any other reptiles, and they were totally enthralled with the reptile tent at a carnival type event we attended in 2015.

They wanted me to take their pictures as they handled the snake and touched various other animals. So despite the fact I cringed as I look at these pictures, I couldn't leave them out of the scrapbook.

Scrapbooking Tips:
With the exception of the letter stickers I used in the title, I used all The Stamps of Life supplies to create this layout. I created the border by die cutting various size circles, overlapping them, and adhering some with adhesive foam.


I did die cut some circles using the Dotted Circle Dies and used the holes to stitch around the circles to give some dimension to the border. All in all, I really like this page - even if there are snakes on it!


Wednesday, June 5, 2019

Watering the Flowers


This is one of those moments with a toddler that can't help but make you smile. For some reason, Zach had shed his shorts, put on a swim diaper, but got sidetracked when he saw a watering can on the porch. I had to keep from laughing as I saw him come out in a polo shirt, his sneakers, and a swim diaper! This kid probably made ten trips in and out of the bathroom, filling up the watering can, and watering the tiger lillies out front. Too cute!

Scrapbooking Techniques:
This was a fun layout to put together and it features one of my favorite techniques - using strips of brightly colored paper to create a background! 

One way I stretch my stash of letter stickers is to mix and match when it comes to creating titles. Many times, I will use tiny letter stickers to spell out the smaller words in my titles, such as: the, and, of, a, in, etc, like I did in this title. It also can be more aesthetically pleasing because you can scrunch a title to fit in a smaller place, or more easily center it because you don't have to fit in the full size letter stickers.  


Monday, June 3, 2019

Zach in the Bushes


I love to create layouts of the everyday, normal things that happen. The way I think is if something was cute enough to take a picture and laugh about it, it is "scrapbook worthy".

Dave was outside working and the boys were playing in the yard. For no apparent reason, Zach started climbing into the bushes! He was extremely determined to get into them and would not give up. Then, as soon as he seemed to reach his goal, he climbed back out. At the time I found it very funny. Zach didn't typically stick to something for longer periods of time and to see him be so persistent for something that didn't make a lot of sense was cute and quirky! So . . . it ended up in the scrapbook.

Scrapbooking tips:
Because of all the green in the pictures, I used green/earth tones for these pages. I thought the rusty orange color was a nice contrast so I carried the orange strips across both pages.

I did not want to take a long time on this layout, so I chose a sketch from Scrapbook Generation that featured all 4x6 and 6x4 photos to save time on cropping. The thick strips of paper were easy to cut and ink, and I used stickers that coordinated with this paper collection to embellish the layout. The stickers had phrases on them to take the place of the title, and thereby saving time on spelling with letter stickers. Altogether, this layout took only 20-25 minutes!

I even kept my journaling short and sweet!

Friday, May 31, 2019

Ice Cream for Breakfast


I created this layout to showcase just some of the ice cream the boys (& Mommy!) ate for breakfast at Give Kids the World Village. What I found funny was that out of all the flavors and toppings they offered, both boys got the exact same thing every visit - a chocolate cone for Caleb and a vanilla cone for Zach. Not much has changed . . . except now Caleb will ask for lots of chocolate syrup and Zach will have a little vanilla ice cream with his whip cream!

Scrapbooking Tip:
I loved the pattern paper I found with ice cream and popsicles, but it was a busier print than I typically use. The only embellishments I used were ice cream cone stickers and then I left well enough alone!  


Wednesday, May 29, 2019

Splash Pad

  
While staying at Give Kids the World Village in Florida, the boys loved the Splash Pad! It was so much fun watching Zach run and play in the water. He was having a blast! Caleb wanted to experience it too, and thankfully he was still little enough I could pick him up and carry him. Dave would do anything in his power to let Caleb experience everything Zach was doing, so not caring what I might have looked like or what people thought, I just picked him up and got wet right along with him!

Scrapbooking Tip:
This is a quick and easy layout that went together in just a few minutes. I followed a Scrapbook Generation sketch that I have used multiple times. I love being able to include six 4x6 photos and it saves time because you don't have any photos to crop!

Even though I love to include journaling, there are some pages that just don't need it, and this was one of those layouts. It is in a vacation album, so that alone tells me when and where these pictures were taken, and the pictures are pretty self explanatory. Scrapping a vacation album can sometimes feel like an endless project and if I can get away without journaling on a couple pages it saves so much time! Also, I find when I'm working on a specific album, the more I can get done in a shorter amount of time, the more my creative juices flow!


Monday, May 27, 2019

Never Forget


I put together a layout of pictures to remember the time we went to the NY State Fair memorial honoring all state law enforcement officers and firefighters who have died in the line of duty. The boys and I were there for the dedication ceremony in August of 2014, but it was the first time we had been back. Jim was visiting a gun show being held at the State Fair in April of 2017. The fairgrounds were empty and we walked over to show Alyssia. 

I am still blown away when I see all the names of men and women who have died in public service - and these memorials don't even count military losses. For every name there are families who loved and grieved. Children who grew up without their father or mother, spouses who kissed their loved one goodbye not knowing it was their last moment together, and parents who had to do the unthinkable and bury a child. 

In the past, when I would see these memorials, I would walk right past. It wasn't that I didn't recognize that people have died for my freedom, and to keep me safe, but it wasn't until Dave died that I understood the cost. Now when I pass memorials of any kind, I'll linger for a minute, read the names, and think about the family left behind. In the act of stopping and consciously reading some of the names inscribed, it is a way of honoring and never forgetting the sacrifices made.

Scrapbooking Tips:
This is a layout I made using paper scraps from my Stamps of Life card kits. I also followed an Allison Davis sketch from her SixbySix2 scrapbooking class. In that sketch's notes she described how to create the piece work which involved cutting paper into 1x2 rectangles then cutting the ends on diagonal lines. 

When I showed some fellow scrapbookers this layout, a recurring comment was, "This must have taken so long!" It did take longer than most layouts I do, but it didn't seem it because I broke the work down in chunks. I cut my rectangles and then stuck them in a bag. During my lunch break at work I traced and cut the slanted edges. While watching TV, I inked the edges of each piece. By breaking the layout down into smaller tasks, it didn't feel like it took that much extra time. I also felt like I was scrapbooking a little every time I pulled out my paper rectangles!


I also have been asked why I chose a purple and grey color scheme. Those are NYSP colors, and Dave was a very proud NYSP Trooper. 

In the photo below, if you look at the stone under 2013, Dave's name is the last one listed.   


Friday, May 24, 2019

Catch a Wave


All around the pool at Give Kids the World Village there are photo opps set up. That's where we took these fun photos. Zach was really getting into posing but he kept climbing up on the wave and wouldn't stay on surfboard! 

Scrapbooking Tips:
Because I used so many full size photos, I kept my design as simple as a 1/2 inch border running above and below the photo block. I placed my title directly on top of the photos to draw your eye right to the pictures.

If you look at the layout, you'll notice that it looks like I did not leave enough space between "a" and "wave," but that was deliberate. When I carry a title across two pages I make a mental note to adjust for the space that will naturally occur when I put my layout in an album. If I had left a space between those two words it wouldn't have looked right once they were in the page protectors.

Once in the album, the title spacing looks normal.


After trying many styles and brands of albums, I decided to use  We R Memory Makers three ring albums for a couple of reasons. The biggest and best reason is the ease of putting layouts into your album - you can add pages without taking apart the whole album. Another reason I chose to use these particular albums is the wide variety of colors they come in. I choose a different color for each year's layouts and my shelves look like a rainbow of color! They are also durable, high quality albums - and the price is right if you wait for JoAnn's to run a 30% off sale and use a free shipping coupon! 

You can check out my favorite albums here.

Wednesday, May 22, 2019

Castle of Miracles


If you read the previous post, I talked a little about Give Kids the World Village, where we stayed when Baking Memories 4 Kids sent us to Florida. Here is another layout showcasing some of the magic of this experience. 

At Give Kids the World Village, they have a Castle of Miracles where every "wish kid" can sign a star and it is placed somewhere on the castle's ceiling. After signing your star, you leave it with a volunteer after they give you your star passport. The next day you go back and scan your passport and a fairy shows you where your star has been hung. 

Both boys also received special wish pillows from a magical tree. They were still little enough to believe there really was magic in that castle. 


Scrapbooking Tips:

I created a border with gold glitter star stickers. When I had just the stars it didn't look "quite right" so I added red sparkly jewels. The round red embellishments helped tie in the polka dotted paper. 


Monday, May 20, 2019

Give Kids the World Village


This layout shows some photos from our Baking Memories 4 Kids trip to Florida. We stayed at an amazing place called Give Kids the World Village. You can only stay here if you have a terminally ill/disabled child. It was an absolutely amazing experience. 

You stay in villas with 2 bedrooms, a kitchen, accessible bathroom and a washer and dryer instead of a hotel room. You can go to the Gingerbread House for meals, or have it delivered to your villa. There's even an Ice Cream Palace where you can have Ice Cream for Breakfast! Give Kids the World is staffed by volunteers who do whatever they can to give families a break from our day to day reality. 

Scrapbooking Tips:
This was an easy layout to "throw" together that uses 4 full size photos! I used a sketch from Scrapbook Generation to showcase some of our favorite photos that I didn't really want to trim down. 

To keep continuity in this vacation album, I tried to use a lot of bright primary colors - especially red when I scrapped layouts of Give Kids the World Village.


Journaling Close Up


Sunday, May 19, 2019

Face Painting


This was a fun layout to put together! The boys loved having their faces painted so elaborately - Zach was Iron Man and Caleb had Angry Birds painted. They waited in a long line and then sat still for a long time. As soon as they were done they asked me to take a picture of them so they could see their faces. I love the big smiles!

Scrapbooking Tips:

I have challenged myself to use my card making supplies to create 50 layouts before the end of the year! I'm calling it "Scrapping My Stash". What prompted me to do this was the abundance of The Stamps of Life supplies piling up in my craft room. I love the bright colors and cute patterns that Stephanie Barnard designs and I wanted to incorporate it into my scrapbooks. The only issue was that my scrapbooks were 12x12 and the card making pattern paper was 6x6. So when I found a class by Allison Davis from Scrapbook Generation that focused on using 6x6 paper pads I knew what to do!

I created this layout using only 6x6 sheets of paper. I cut strips to create banners following one of  
the sketches. I cut photo mats out of The Stamps of Life cardstock that coordinate beautifully with the pattern paper left over from a card kit. I had left over embellishments from another card kit and the layout all came together! Creating this layout opened my eyes to all the awesome possibilities I had in my "stash" of card making supplies.

Click the link to check out one of Allison Davis' scrapbooking classes!

Sunday, May 12, 2019

My Boys


This is one of my favorite pictures of the boys! Dave and I had gone away for the night and the boys spent the night at Grampy and Grammy's. The next morning Grampy posted this picture on Facebook and my heart melted. 

These two made me a mommy. They are the ones who came to me to have their boo boos kissed, to dry their tears and make them feel safe when they were scared. I don't always do right by them. I know how imperfect I am, and the mistakes I've made as their mom. But, just when I think I couldn't love them anymore, they do something to make me fall in love with them all over again!

Scrapbooking Tips:

Because I wanted to do this layout just for me, I didn't want to use any typical "boy" colors. I loved my mother-in-law's flower boxes in the background and the bright purple petunia's and that inspired the lavender / pastel color palette.


Friday, May 10, 2019

I Love Zach Hugs


What is better than hugs from your child? We were at Hershey's Chocolate World in Hershey, PA, and poor Zach was getting tired. He wanted me to hold him and when I picked him up he curled right up and hugged me.

This is such a special memory. This was a little less than two years after Dave died. I decided to take the boys to Lancaster, PA to Sight and Sound Theater to see a show, and then to Chocolate World - something Dave and I had planned to do together. We had made this same trip in 2001, and I was having such a hard time, remembering being there with Dave and feeling guilty that I was the one getting to see the boys experience everything.

When Zach cuddled up for a hug, my heart melted. It was just what I needed.

Scrapbooking Tips:

I used two of my favorite techniques on this layout. I made my own embellishments and added some hand stitching.


Once again, I used pattern paper from The Stamps of Life and created hexagon embellishments to mimic the pattern paper I used for one banner. This technique is not hard, just a little more time consuming than adding a sticker. Although I love using stickers, sometimes I feel like doing a little extra on the pages that bring back really special memories.


I also took the time to hand stitch the heart in the title. I love the look of stitching on my pages and wish I had the time I could do it on every page, but I know that is just not practical. This was a quick simple heart that took less than 10 minutes from start to finish! I used a stencil and paper piercer to poke the holes in my page.

I chose to stitch the heart to mimic the design in the hexagons to tie everything together. I really try to give my pages a cohesive look and I thought the stitched heart would help pull everything together!

Wednesday, May 8, 2019

Facial Time


I am blessed in the fact that my husband loves taking photos just as much as I do! When I saw the selfie he took with Alyssia, I immediately began imagining the scrapbook layout I would make. I love that Jim joined in and wasn't afraid of looking silly and even took the selfie.

Although I love to scrapbook the big life events like birthdays, Christmas, school events, it's the everyday moments that fill my scrapbooks. Moments like this would be lost without the time and attention to take the photos, and then my obsession to scrapbook them.

Scrapbooking Tips:

I used a sketch from Scrapbook Generation as my inspiration, and then went through my scrap pile from cards I had recently made. I cut my scraps into strips and inked the edges in black ink. I followed the sketch pretty closely and lined the top of the page, and then created the design behind the photo.


My favorite element on the page is the hexagon embellishments I created using dies from The Stamps of Life. I took the inspiration from the pattern paper I used. I thought the flower design in the hexagons gave the page a more feminine look, and picked green, pink and blue to be the accent colors. I used these same colors in the banners at the top of the page to help keep cohesive look.


The overall page is bright and cheerful and I was really pleased with the final results!

Monday, May 6, 2019

Zach & Mom


I typically do not like pictures of myself - I am my own worst critic, but this is one of my absolute favorite photos! I was laying on Caleb's bed talking to him and Zach came and jumped on my back. My mom was there and grabbed my phone and took this picture. I love that she was able to capture this cuddly moment.

I've learned that there is a last time for everything, and as the boys get bigger I know the day is quickly approaching where there will be no more cuddling. I love having pictures like this in my scrapbooks!

Scrapbooking Tips:

I challenged myself to use some of my card making supplies from The Stamps of Life to create scrapbook layouts. I used my favorite go to source for inspiration - a sketch from Scrapbook Generation - and then I gave it my own twist.

I loved the color pattern from the Friend pattern paper pad and picked the chevron paper as my starting point. The Stamps of Life only sells 6x6 pattern paper and 8.5x11 cardstock, so I had to get creative creating the larger banners. Once I had the widths I wanted, I cut my strips in half widthwise and then used the 6x4 photo to fill in the gap.


I die cut the hearts and created a visual triangle across the page. The page looked good, but I felt it was missing something. I dug through my stash of card kits and found these mirrored hearts and used them to add a little sparkle to the page.

I'm pleased with my results and love the memory this page brings back!

Saturday, May 4, 2019

Star Wars Jedi Training


There is not much to say about this layout, but I wanted to share it in honor of May 4th. Sometimes my creative juices have run dry and I feel overwhelmed by the stack of photos waiting to be scrapped, and when this happens I turn to page kits. 

I had bought this page kit at a Creating Keepsakes Convention long before the boys even knew about Jedi Training at Disney. It was in my stash and thought it would be a good way to showcase my 5x7 photos of the boys taking on Darth Vader. I didn't add anything to it other than my photos. 

Sometimes a premade kit is all you need to add a little variety to your scrapbook! 


Friday, May 3, 2019

Darth Vader


This page does not have cute or poignant memories of my little guys, but I wanted to capture the feeling of when Darth Vader first appeared during Jedi Training. It was ominous because the theatrics were awesome! The actors leading the kids, starting to act nervous and announce they felt a "disturbance in the force" and then the fog started as the Imperial March (aka Darth Vader's theme) began to blare over the sound system. The doors opened to reveal the Sith Lord there in the flesh. 

The actor was phenomenal. He circled the stage, glaring at the kids and then the audience, while flipping his cape out the way over her shoulder. All the while you heard the amplified breathing noises synonymous with this character.

I was actually pleasantly surprised that Zach stuck it out. I was afraid he'd be too intimidated to continue, but he was an incredibly brave Jedi.

Scrapbooking Tip:

I absolutely LOVE this page and the story behind it is pretty cool. I had purchased this paper and die cut from Scrap Your Trip, and I originally planned to put only one 5x7 photo of Darth Vader on the layout. The problem was that no matter how I positioned it, I was blocking a major design on the paper, and in all honesty, it just looked stupid! 

I was working on this layout at ta scrapbooking retreat, and I remember one of my friends teaching a class on using pattern paper. I asked Annette what I should do with this paper. Immediately she told me I should cut a square out of the paper around the buttons, mat that square on a piece of black cardstock and then mount it with dimensional adhesive back in place.  The result was amazing. Her technique gave the paper a life of its own!


I tossed the original 5x7 photo and found my three favorite pictures of Darth Vader that could be cropped down to 3x4. I adhered them in a row at the top of the paper and then adhered the die cut title with adhesive foam. 

Without a doubt, this is one of my favorite Star Wars layouts. I left my comfort zone and was totally open to suggestions and it really paid off!

Wednesday, May 1, 2019

The Dark Side


I know I may be biased, but I thought my little Jedi's were adorable. Between the photos from the professional Disney photographers, and the pictures I took, I had over a hundred of them battling Darth Vader. I had a hard time narrowing them down to just eight prints for each boy!

I'll be honest. I love my boys, but I'm not a huge Star Wars fan. While I want to preserve these awesome memories, I'm running dry on Star Wars Inspiration when it comes to creating scrapbook layouts. So my solution to speed up the scrapbooking process but not sacrifice creativity was to  "scraplift" myself. I took one design and made two layouts.

I used a sketch from Scrapbook Generation that would allow me to use full size 4X6 and 6x4 photos. I normally follow these sketches completely, but in this case, I only referred to it for photo placement. I had a paper pad of Star Wars paper that had three sheets of each design. And this is where the creativity came in!

I cut the 12x12 sheet of paper in half. I adhered the now 6x12 pieces to the bottom of Caleb's layout. For the vertical photos, I trimmed them only slightly and put them on red photo mats (not to match Zach's clothes, but to match Darth Vader's lightsaber). I then adhered my photos as shown.

To create embellishments for these pages, I cut the various "dark side" phrases out of another piece of pattern paper from the same pad. I adhered those strips for the titles. Each boys' layout got different phrases. 

On Zach's layout, I created a mirror image, placing the pattern paper and vertical pictures on the top of the page. Even those these pages are basically identical, there are a few subtle differences. 

The photos are the most important element of these pages, so even though I took shortcuts, I'm completely satisfied with the finished product. They capture my boys living out the ultimate lightsaber battle, which I am sure they will never forget!

Tuesday, April 30, 2019

Jedi Training


The boys created some awesome memories when they participated in Jedi Training at Disney's Hollywood Studios! That was all they wanted to do when they found out that we would be going to Disney. To make this happen, I rushed the boys and Nana and Papa that morning to get to the park right when they opened, then ran / dragged them to the kiosk where we could sign them up. Once I got them into the 1:20 pm Jedi Training session, this Mommy relaxed!

At the appointed time, we came back and the boys put on Jedi robes with all the other Jedi's-in-training. When it was time, they paraded to the stage outside of the Star Tours ride while the Star Wars theme played in the background. I'm not embarrassed to admit I got goosebumps when I saw the boys so excited and happy.

I'm also not embarrassed to admit that on the way back to Give Kids the World Village, I cried. It had been 15 months since Dave had died, and grief still crept up on me at the worst times. The boys had just had the experience of a lifetime! They were 6 and 7 years old and had successfully battled Darth Vader, and I felt incredibly sad because their Daddy should have been cheering them on and he wasn't there. Thankfully, the boys were too happy, tired and sweaty that they did not see my tears. But my parents noticed and I know they were thinking the same thing I was. 

Scrapbooking Tip:

Here is the first Jedi Training layout in our vacation album. I took one of my favorite photos of each boys and adhered them to a specialty paper from Scrapyourtrip.com. The Jedi Knight Die Cut was all I needed to make this simple layout. 

In all honesty, I was planning on adding more to this page. I started off with white photo mats under each photo, but they didn't look "right". I also tried various other die cuts, but I felt like it made the page look too cluttered. One rule of thumb I follow while scrapbooking is, "When it doubt, leave it off." More times than not, I'm happier with the finished layout when I went simple.

Monday, April 29, 2019

Star Wars . . . May the Force be with You


Unless you are Star Wars fan, you may not recognize the significance of this week. This coming Saturday is May 4th, which to Caleb, is a big deal. This day, according to Wikipedia, is Star Wars Day. Why May 4th? Because May 4th sounds like, "May the force," as in the famous line spoken by Jedi's, "May the Force be with you."

So in honor of this unofficial "holiday" of sorts, I've decided to showcase some of my (many) Star Wars layouts, and to make my son smile.

These layouts are all from our Baking Memories 4 Kids dream trip to Give Kids the World Village and Disney World.

When the staff at Give Kids the World Village found out that Caleb was a Star Wars fan, they staged a fun surprise meet and greet for the boys. They called in Star Wars fans, who came in costume to play with the kids. A staff person came out to greet the boys and said, "There are some people here that would like to meet you." When they opened the doors the boys went crazy! There was a moving R2D2, a Storm Trooper, a Tuscan Raider, and Jedi students. They lightsaber battled with the boys for over a hour!

Scrapbooking Tips:

I had so many photos, but I forced myself to one layout - with a creative twist.

The layout you see above contains 13 photos. I used black cardstock for the base and laid out 12 of the photos in a grid formation. I then cut down a piece of specialty "Star Wars" paper to fill in the left page. I adhered my 5x7 group shot and added a Star Wars die cut that I order from a specialty scrapbooking company called Scrap Your Trip. I added a top and bottom red border to compliment the red light saber in the die cut title.

When I put this layout in the album, I added a half page insert with additional 4x6 photos that could not be cropped down, and my journaling. By doing this, I kept this event to one layout, but was able to add some extra (adorable!) photos.


For amazing die cuts and specialty paper, especially if you're working on a Disney album, visit Scrapyourtrip.com. It's an amazing website where I purchase unique and creative papers and embellishments. I also find them to be reasonably priced in comparison to other companies offering comparable products. This is the first place I go when I start scrapping a vacation album!

Friday, April 19, 2019

Easter Bunny Card


This Easter card was relatively simple in design, but a lot of attention went into the small details. I colored and shaded the belly and ears with pink alcohol markers, as well as the die cut basket. I chose to leave the bunny white even though my son thought I should color it blue!

I die cut the Easter eggs from pattern paper and added them to the basket. I placed one larger size egg in the back of the basket and three smaller eggs in the front. Inside of the card I stamped "Wishing you a very Happy Easter".

The Stamps of Life Supplies Used:
bunnyfriend4bear
Blessings Collection Patterned Paper Pad

Thursday, April 18, 2019

Chocolate Bunny Easter Card


I admit it - I am a chocoholic - even when paper crafting! This stamp was too cute. I used my spectrum noir alcohol markers to color and shade the chocolate bunny that is front and center on this card. I added coordinating pattern paper and a few die cut Easter eggs to complete the card front. It looks good enough to eat!

The Stamps of Life Supplies Used:
chocolatebunny2stamp
Chocolate Bunny & Bow Dies
Blessings Collection Paper Pad


Wednesday, April 10, 2019

Smile Card


I used to think that I needed to spend a lot of time creating elaborate cards, but I find that my favorite cards tend to be my more simple creations - like this one.

With a few stamped smiley faces, a cute sentiment stamp and chevron pattern paper I have a card that took less than five minutes from start to finish!

The Stamps of Life Supplies Used:
faces4stamps
Rectangle dies
Quote dies, and sentiment from November 2018 Card Kit (Incredible Collection)

Saturday, April 6, 2019

Sunshine Card - Part 3


I loved the sentiment on one of my Stamps of Life Card Kit stamp set - it says "You are Pure Sunshine." I was inspired to create another sunny card. Initially I had planned to use just the sky color palette but it didn't look right with the two toned sunshine. I grabbed a scrap of floral paper that coordinated with the blue, yellow and peach color palette. It added just enough a pop of color and really brightened up the card!

The Stamps of Life Supplies Used:
Sizzix Triplits Hello Sunshine
Rectangle Dies
Incredible Collection Paper Pad

Friday, April 5, 2019

Sunshine Cards - Part 2


I love the Sun Triplit dies - lately I can't get enough sunshine on my cards and layouts!

Here is another simple card that I put together completely from paper in my scraps stash. I picked the grey and yellow color scheme because of the song, "You Are My Sunshine." When I saw the yellow scrap paper all I could think about was the line, "You make me happy when skies are grey," and knew I wanted a grey card base.

One suggestion in working with any of the Sizzix triplits is to use adhesive sheets. It makes layering and putting the pieces together so easy!

Supplies Used:
Friend Collection Paper Pad
Sizzix Triplits Hello Sunshine
Card Kit Club stamps

Thursday, April 4, 2019

Sunshine Cards - Part 1


According to the calendar, Spring has arrived in Upstate NY, but as I write I'm listening to the blustery wind outside. So in my attempt to reassure myself that spring really is on the way, I'll pulled out my sunshine stamps and dies, and created some spring themed cards!

Here I had fun using the Hello Sunshine Sizzix Triplits. I grabbed paper scraps in my color scheme and created this fun, simple card. Layering the sun and clouds added so much fun detail and dimension.

Supplies Used:
Sizzix Triplits Hello Sunshine dies
Adhesive Sheets
Sunshine Collection Pattern Paper

Wednesday, April 3, 2019

Baptism Cards

Alyssia's friend was baptized this past Sunday and we were invited to help Morgan celebrate this major decision in her life. Alyssia asked me if we could make a baptism card. She knew exactly what she wanted. She pulled out my Stamps of Life Step Up card dies, and she picked her favorite colored cardstock, and then we found some coordinating pattern paper. She wanted to put a cross on it somehow so I suggested we adhere it to back step and add some die cut grass. 

We both were pleased with the results. I enjoyed having the opportunity to create with my step-daughter and share my passion of paper crafting.


This is the card the rest of the family gave to Morgan. I used the new Stamps of Life Elegant Edge Die - which is probably my new favorite card die.


The Stamps of Life Products Used:
Elegant Edge Die (HSN exclusive)
Basic Step-ups Card Die
Script Alphabet Dies
Cross Dies
Grass Die


Thursday, February 7, 2019

Lacy Heart Card


Valentine's Day is a week away and I'm getting in the mood! I created this fun lacy
 card using the Sizzix Scallop Heart Fold-Its die.

Once again I used one of my favorite color combinations - red / gray. The gray backdrop is actually a piece of pattern paper that has tiny white hearts.

On the inside I stamped the sentiment "LOVE BIG" from the Stamps of Life December 2018 card kit.

This was a quick and simple card, and I love the finished product. Using any of the fold-it dies designed by Stephanie Barnard are so much fun to make!

Wednesday, February 6, 2019

You Melt My Heart


This card was so much fun to make! I love that it can be used as a winter / Valentine's Day card.

I started with a light blue card base and stamped tiny snowflakes from The Stamps of Life soup4snowman stamp set.

I then cut some white cardstock using  a Sizzix Edgelit die to create the look of a snowy landscape.

I stamped and die cut the snowman using snowman2build stamps and dies, but added a pink heart instead of a scarf or buttons down the front.

I used the sentiment from the December 2018 card kit to complete the card.

Tuesday, February 5, 2019

Adore You Card


Here is a quick and easy card I made using my Stamps of Life Card Kit Club. I love the red and gray combination - especially if I'm giving it to my hubby!

I created a layered backdrop of using my dotted rectangle dies. I then inked the edges with strawberry ink to help them stand out.

I placed the smallest rectangle horizontally on the card and then adhered my "Adore"able heart. Because I was trying to make a more "manly" card, I chose not to add any extra embellishments.

Thanks for looking!

Thursday, January 31, 2019

You are Loved A Lot Card


There are a lot of boys and men in my family and I love it when I can make hearts look masculine. 

All my stamping supplies come from The Stamps of Life, and the color palate is full of rich colors like this midnight and green apple. I paired these solid colors for the card, and used a die to create the polka dotted card.

Two layered green hearts provided a place for my stamped sentiment. The only "girly" thing on this card is the bow. I needed to fill some space. I chose a grosgrain ribbon with white stitching. I didn't want the ribbon to look lacy or even "soft".

This is a simple valentine's card appropriate for one of the special men in my life!


We Love Candy

Who doesn't love candy? My kids have inherited their mom's sweet tooth. Although, as I've matured I forgo the sour patch kids...