Friday, September 28, 2018

Zach's First Apple Picking


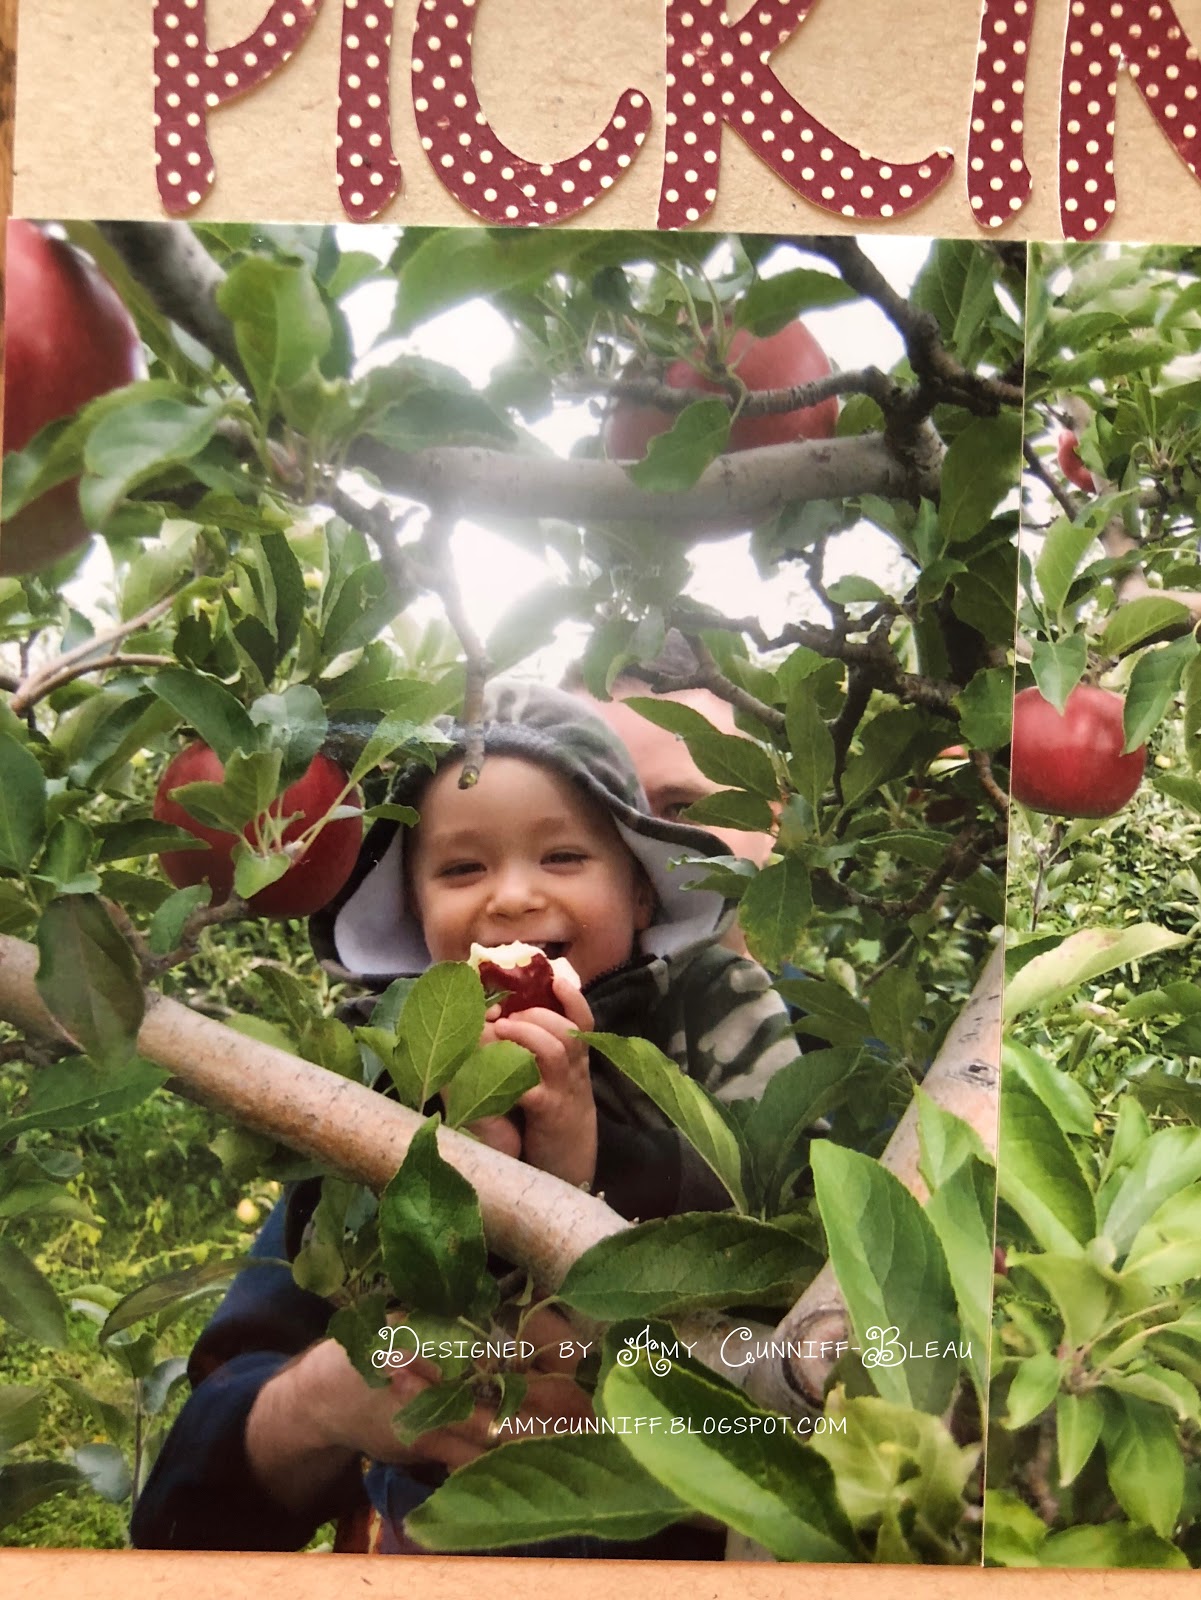
My goal for this layout was to find a way to showcase multiple photos. I found a sketch from Scrapbook Generation that allowed me to scrap 9 photos but not sacrifice on the design of the page.

For the colorful strips I used the same pattern paper I used on the Bopple Picking layout to keep continuity in my albums. (Because I have learned that it is impossible for me to do just one layout on an any given event!)

Scrapbooking Tips:

You can see creases on these pages and can tell this layout has not held up well – and I’ll tell you why. The background paper I used was inexpensive and wrinkled the very first time I slipped it into a page protector.

One very valuable lesson I have learned is not to use inexpensive card stock or pattern paper for your background. One technique I use a lot in scrapbooking is to mark my pages with faint pencil lines to help me place things straight on my page, or I might write something in pencil and go back and trace over it. Cheaper paper or card stock does not hold up well if you use erasers!

Now I exclusively use Bazzill cardstock. It’s more expensive than regular cardstock, running about a $1/sheet, but worth every single penny! I will stock up on colored Bazzill cardstock when it goes on sale for 2/$1 at Michael’s Arts & Crafts. I also buy black, white, and kraft colored 12x12 sheets in packs of 25 from Scrapbook.com. I can confidently say, I won’t go back to discount paper – it’s just not worth it. If I’m going to put my time and effort into a layout I want it to last and that means using quality card stock and adhesive!


Thursday, September 27, 2018

Apple Cards - Part II


I had so much fun making this shaker card! A shaker card is where you add glitter, sequins, confetti, beads, etc in between two layers. When you shake the card the pieces all slide around crating a fun and pretty effect!

I could painstakingly write out step by step instructions on how to create a shaker card, but I decided to add a link to a Youtube video I used to learn this technique. It's taught by Stephanie Barnard from the Stamps of Life. 

Happy Stamping!


Wednesday, September 26, 2018

Apple Cards - Part 1


Not only do I love fall scrapbooking, but I like making fall themed notecards! The Stamps of Life have an adorable apple2stamp and patterns4apples clear stamp sets, along with the coordinating dies. I have used this set to make many cards and scrapbook embellishments. 

Here is a simple notecard. I used scraps in my stash, and stamped the apple to mimic the apple on the pattern paper. 

Tune in for more apple cards in the coming weeks!


Bopple Picking


This layout captures Caleb’s second trip to the apple orchard. He was 20 months old and we had just found out that something was medically wrong with him, but we were months away from a diagnosis. Even though our hearts were heavy we kept on with tradition – after all it would be Zach’s first trip to the orchard.

"Peek-a-Boo, Mommy!"


Photo Tip:
Caleb thought it was so funny when Dave would lift him up to pick an apple and he would see me through the leaves. Dave would say, "Peek a Boo" and Caleb would belly laugh. I got the camera ready and when Dave lifted him up, I snapped this picture between the branches. As you take pictures ask yourself is there a new and funny way you could frame or pose your picture? You might just love the results!


Scrapbooking Tips:
Other than the adorable photos, there are two things I particularly love about this layout. The first is the apple tree. I hand drew a tree trunk and cut it out and adhered it to my page. I used a scalloped circle punch and created leaves. To make my apples I used red apples threaded with green embroidery floss. 

The second element I love from this page is the title “Bopple Picking”. Bopple was how Caleb said apple. I'll often use these words in my titles and journaling as a way to remember all the cute little things the boys said.

This was a fun page to put together. It held fun memories and I really enjoyed trying to figure out how to make the perfect apple tree!


Monday, September 24, 2018

Apple Picking


I love autumn – hands down it is my favorite time of the year! One fall tradition that I used to do every year was to go apple picking at Bowman Orchards. Dave and I celebrated our first wedding anniversary with a trip to the orchard and day dreamed about one day bringing our kids there.

After Dave died it was just too painful to go for a couple of years. I couldn’t bring myself to take the boys without their Dad. Caleb went in 2014 with Grammy and Grampy while I was working one day and Zach was in preschool. I was happy that he enjoyed the day but knew that I wasn’t ready.

Thankfully my heart continued to heal and I am happy to say we are now apple picking again every year! In honor of this season and a reminder that there is time for everything, I’ll be showing various apple picking layouts from over the years.

This was apple picking 2009. Dave’s grandmother and aunt were spending a few days with Grammy and Grampy and we decided to go together. (At that time there were only three Cunniff grandkids – we’ve grown a little since then!)

Scrapbooking Tips:


I wanted to use larger and busier photos so I kept the background simple. I cut a 3 or 4 inch strip from a page of apple pattern paper and layered a photo on top. I kept the title in a neutral color so it did not compete with the colors from the pictures. I cut pictures down to a 3x4 size to create a grid design on the right page.

The colors were so rich on the pattern paper that any apple stickers I had were way too bright. So I improvised. I fussy cut apples out of the pattern paper scraps. That way my embellishments were a perfect match! I overlapped them and adhered a couple with a pop dot to give it dimension.

Photo Tips:

I loved the look of the deep red apples on the trees with the vibrant green leaves so I snapped a few scenic shots. When I was putting together the photo grid I included just an apple shot.
I also zoomed in on the picture of my sweet niece Olivia trying to chow down on an apple. Cropping the photo down to a 3x4 size really draws your eye to her sweet little baby fingers!


Friday, September 21, 2018

Mickey, Minnie & Goofy


This layout records the special photo op the boys had with Mickey, Minnie & Goofy - all together! I ordered one 8x10 photo, and then used 6X4 photos that I trimmed down. I loved how Caleb was playing with the button on Mickey's shorts. 

This was busy page, but it still looked empty without a border. I had a very bright colorful sheet of Disney character pattern paper. I knew that I would never use it "as is" because it is just not my style. As I was going through my stash of Disney stickers and embellishments, nothing was the right size for a border - either too big or little. When I saw the pattern paper I decided to trim it down and cut out pictures of Mickey, Minnie & Goofy. I adhered them with adhesive foam and then overlapped them to add a little texture and dimension.


Because I had already done layouts with the individual characters, and this layout will follow those in the vacation album, I didn't feel the need to add a title or journaling.

I will admit this layout is a little busier than I traditionally make, but it's a Disney layout so I thought I could get away with it! 


Thursday, September 20, 2018

Bright & Cheery Thank You Card


This is was a fun card to make! I created my own background paper by blending ink in my favorite color combinations onto white card stock. The "Thanks So Much" stamp also came from The Stamps of Life. I cut out two rectangles using scalloped rectangle dies from The Stamps of Life, and then adhered them to a card base. Quick, easy and eye catching!

Wednesday, September 19, 2018

Meeting Minnie Mouse


In addition to meeting Mickey and Goofy, the boys met Minnie Mouse. It was cute to watch because while Mickey and Goofy hi-fived the boys and patted their shoulders, Minnie gave lots of hugs and kisses. They weren't quite sure what to make of it. Zach eyeballed me as if to say, "This giant mouse is kissing me - do something!"

Scrapbooking Tips:
Like the Mickey and Goofy pages, I stretched myself to make my own embellishments. I used similar busy pattern paper from Scrap Your Trip and I added more photos to this page, so I had to be creative and minimal adding anything else. While I love pages where I can include many photos, it’s always a juggling act making sure you leave enough white space on the page for your eye to rest.

Unlike the Mickey and Goofy layouts, I couldn’t use the Minnie Mouse stickers I had because they simply overpowered the page. I need something physically smaller. I had felt Mickey heads that I had purchased probably four years earlier. But they were  Mickey not Minnie. So I took ribbon scraps and painstakingly tied three tiny bows and adhered them with mini Glue Dots to turn them into little Minnie’s.


To Journal or Not to Journal?

I find with most Disney pages I can get away without having to add journaling. The layouts are in the vacation albums so I know the date, and unless something exceptional or cute happened, like getting an autographed Darth Vader lightsaber, I tend to leave off any journaling. It greatly spends up the process when I’m trying to get albums done.


Monday, September 17, 2018

Cards from Scraps


I absolutely LOVE finding new ways to use up my scrap stash! I had strips of pattern paper left over from other cards I had made and they didn't even need to be trimmed. I added some stamped sentiments and some embellishments and created three generic note cards in less than ten minutes! How do you use your scrap stash?

Meeting Mickey & Goofy


If you’ve been to Epcot Center in Disney World  you’ll probably recognize the photos in these layouts. It’s the character meet and greet with Mickey, Minnie & Goofy! Because we were there as guests of Give Kids the World Village, Caleb had the magical Genie Pass and that means Disney staff took notice and went above and beyond to give Caleb a magical vacation. This photo shoot was no exception because even though the characters were in individual locations, the photographers brought Mickey, Minnie, and Goofy’s location so the boys and I could get a group shot in addition to the individual character shots.

Scrapbooking Tips:

In my vacation albums I really strive for a consistent look and I ordered paper and embellishments from Scrap Your Trip. Then I went to my favorite spot for inspiration – Scrapbook Generation Sketches. I found a sketch that would work with both layouts and made mirror image pages. If you notice they are very similar but reversed. I had to play around with the photo placement because I did not have the same number of vertical / horizontal photos with each character – but in the words of Tim Gunn from Project Runway, I “Made it work!”


Because the background paper was so busy, I custom made embellishments that would break up the pattern. I had clear character stickers but if I placed them on the solid color background they disappeared. My solution was to stick them on white card stock then carefully cut around the sticker.


Then, using my dotted tag dies from The Stamps of Life, I die cut three large tags out of solid cardstock. I adhered the character stickers with foam adhesive and added complementary ribbon left over from one of my Stamps of Life card kits.

Although these pages are a little busier than I usually make, I like the finished product. I also liked the challenge of having to make my own embellishments out of my stash . . . .. I’m planning on doing that more often!


Friday, September 14, 2018

Daddy's iPod


I love these pictures of Zach listening to Dave’s iPhone while waiting for the bus. Whenever Dave was wearing his ear buds the boys always wanted to listen too! Even though Dave was using his iPhone Caleb continued to call it Daddy’s iPod when listening to music – so I kept the title "Daddy’s iPod" to remember the cute things the boys used to say. It’s these everyday moments I would forget if I didn’t scrapbook them.

Scrapbooking Tips:


When I saw the So Rad paper collection from Simple Stories I fell in love! I knew the color palette would work with so many of the photos I had taken of the boys. And when I saw the iPhone and headphone stickers I knew it was perfect for this page!


I also mixed two different types of letter stickers for the title. I loved the look and the tiny letter stickers added the turquoise color to balance out the journaling block in the opposite corner.

I don't like that many sticker sheets do not have apostrophe stickers. Sometimes I will cut apart an "x" or "k" to make an apostrophe but it didn't work with the square letter stickers, so ever the English major, I added it by hand!

Thursday, September 13, 2018

Birthday Cards

I absolutely loved the Birthday Wishes card kit from The Stamps of Life! It was full of bright primary colors and included the circle Birthday Wishes die. I made these birthday cards:


I love the look of a simple card - not to mention it doesn't take too much time to put together. I also like the rainbow color pallette. It works for boys, girls. kids and adults!

Wednesday, September 12, 2018

Darth Vader's Lightsabers


These are a couple of layouts from our Baking Memories 4 Kids Disney trip - and what an amazing
experience they capture! Caleb LOVES all things Star Wars and he had an fantastic time doing Jedi Training, after which we headed over to the Star Tours Ride. While we were waiting in line we saw Darth Vader posing for pictures and the boys went to get in that line, but we were  told that this photo op was for kids who were not able to do Jedi Training. Even though the boys were disappointed, they didn't say a word and kept going toward the entrance to the ride.

About two minutes later we heard someone calling, "Caleb! Caleb!" We turned to see a Disney employee looking for Caleb. We were shocked when we he said, "Darth Vader would like to meet you," Caleb took off following the employee. Darth and his stormtroopers were waiting for him and Darth handed Caleb his lightsaber! At first Caleb thought it was just to hold for the picture, but then Darth pointed to where he had autographed it and said Caleb could keep it. Caleb was ecstatic! 

Even three years later, that lightsaber still holds a special place in Caleb's heart. We don't take it out or pass it around too much, and Darth Vader's autograph is still legible. Caleb has already said that when he has a son (who will be named Luke), he will give him this special lightsaber.


Scrapbooking Tip:


I have many Star Wars stickers but no lightsaber stickers that were big enough or " just right" for these layouts.  I searched "lightsaber scrapbooking embellishments" and saw many versions of a paper pieced lightsaber. So I grabbed a pile of scraps, and through trial and error, and put together the hilt of the saber, using an enamel dot for the power button. I wanted the embellishments to be a focal point so I stretched the blade of the lightsaber across both pages.

To keep continuity between the two layouts I used the same lightsaber technique and the pattern paper. 

On an Unrelated Star Wars Note:

To write this blog entry I actually had to consult a Star Wars style guide! I didn't even know that it existed until I googled "Do you capitalize lightsaber?" You can find this invaluable resource on dailydot.com. The article title even made me smile, "Our 'Star Wars' style guide will help you avoid Wookie mistakes."


Monday, September 10, 2018

Spinraza Day


You may think it odd to see pictures of Caleb in the hospital on a layout with a celebratory feel, but this truly was an amazing day! When Caleb was diagnosed we were told, “No treatment, no cure,” but that is no longer true! On December 23, 2016, the FDA approved the very first SMA drug treatment, known as Spinraza. This drug goes into the spinal column through a lumbar puncture, and although he knew it was going to be an uncomfortable procedure, Caleb couldn’t wait to get the drug!

However, this was not an easy endeavor. Caleb went for his first dose which was scheduled at bedside. Caleb’s scoliosis complicated the procedure. After 90 minutes of attempting to get a needle to enter his spinal column with no success, the doctor sent the medicine back to the pharmacy, and we called it a day. I don’t think I have ever been as disappointed.

 Our next step was to wait for an appointment to do the spinal tap under fluoroscopy, which would mean that an x-ray would guide the needle. On our second attempt we all were holding our breath, but once the procedure got under way it only took 30 minutes before Caleb was being wheeled back to the recovery room! I got to go into the procedure room with him and when the doctor administered Spinraza I cried happy tears. I took that picture of him with a big smile to post on Facebook for everyone who had been praying and waiting for the good news.


I loved Caleb's smile right after his procedure! 

Since Caleb started getting Spinraza we’ve noticed many positive changes. His voice and breath control are stronger. His hands are stronger and he can do more with them before they fatigue. His handwriting is darker and he is able to move his legs a little more. We even took a video of him leaning forward in his wheel chair to pick something up and sit back up! So for all of these reasons, I wanted this page to capture the joy we were feeling as a family.


Scrapbooking Tip:

I used Simple Stories’ Let’s Party paper collection. I liked the bright colors and the banner and streamer stickers.

Once again, I love banner stickers! I overlapped them in the upper left corner. I placed them there because there was so much going on in the bottom right of the page. By having a small embellishment in the opposite corner, it helps balance the page. I added the top banner with dimensional adhesive to create the look of real banners. 


Friday, September 7, 2018

Honor Roll


In keeping with the back to school theme this week, I decided to show this layout I did of Alyssia making 3rd Quarter Honor Roll.

When I do certain photos such as Christmas, Birthdays, Back to School, I tend to do a whole bunch all together while all those themed supplies are out. It was no different with this layout. I actually got the idea from the "Making the Grade" sticker I saw when I was doing another layout. I thought of these pictures and knew I wanted to make up this page.

I'm never sure how to use the pennant stickers shown here, but after flipping through some Scrapbook Generation sketches, I got the idea to have them go to the right of the photos, in a stacked and overlapping fashion. I'm pleased with the way it turned out!


Photo Close Up:


There are two things that I want to point out about this photo. First, when I saw that you could clearly read the certificate Alyssia was so proudly holding, I realized that I really did not have to add any additional journaling. The certificate is self explanatory. 

Secondly, I realized that as a scrapbooker this was an epic fail as far as taking the photo. Alyssia and her friend posed against the wall, but it didn't even occur to me to have her move over a few inches to avoid getting the padlock in the shot! It's such a beautiful picture of Alyssia and that lock being there really bugs me. Now I know I could have photo shopped it, but at the rate I take pictures I don't spend too much time to cropping and editing - my goal is to just get my pictures ordered so I have them ready when I get time to scrap. And the weird thing is, the lock didn't start bothering me until I noticed it after the layout was done and I took a minute to look at the finished product. It was like my eye went right to it! But, now I know. I learned from my mistakes and hopefully you'll learn from me and not make that mistake at all. And it still doesn't take away from Alyssia's beautiful smile!


Thursday, September 6, 2018

Donut Worry Be Happy Cards


Aren't these donut and coffee stamps adorable? And of course they go together so well! Once again they are from The Stamps of Life - my all time favorite stamping company - and I loved making thank you cards and gift card holders with the donuts2stamp, coffe4two, and coordinating dies.


I turned this card into a gift card holder. It's perfect for a coffee gift card as a quick thank you gift!


I also made this Step-Up card into a gift card holder, but my favorite element is the die cut donut with the Sprinkles! Glitter. It looks just like a sugared frosted donut.  


Wednesday, September 5, 2018

Bus Ride


Ah the obligatory photos of Zach's first day riding the bus! They are too cute not to scrapbook - especially with the little tag we had to clip on Zach saying what bus routes he took. I used a sketch from Scrapbook Generations as my starting point and then added things along the way.

Journaling Close Up:
I LOVED these pencil stickers included with the Simple Stories Smarty Pants collection! But I needed more space than one sticker would give me, so I added two! An added bonus is the points of the pencil point to the picture of Zach's bus.


Tuesday, September 4, 2018

"Sweet" Cards

I loved making these "sweet" cards. I was excited when The Stamps of Life started selling pattern paper to match their candy2share stamp set. The colors were so bright and vibrant, and I had fun mixing and matching. The simple sentiment "You Are So Sweet" also made these cards versatile. I kept some as blank notes and then turned some into birthday and thank you cards. 


These two flip-it cards were made using Sizzix Rectangle/Gift Card Flip-Its Card Set. I made them into gift card holders with a thank you sentiment on the inside. I've used them when I have given my children's teachers gift cards. I also like using this flip-it set just as a rectangle. I feel like I have more surface area to work with when I'm stamping or adding die cuts to these card fronts.


A simple ribbon scrap tied in a knot can really add a lot to a card, without any added time or effort.

Monday, September 3, 2018

Zach's First Day of Kindergarten


Here is a layout of Zach on his very first day of school! I went back to work teaching the same day and I deeply regret that I missed being there, but am so glad that Daddy was there and Zach has that memory.  The boys and I had spent the night before school at my mom's house. I had to leave for work before Dave would get home from working the night shift. So he got Zach ready and took all the photos. When I saw the picture he took as he was walking back to the car, my heart broke a little at Zachary’s face! My baby looked so sad, but then I reminded myself this was a normal rite of passage for every child and mommy.

I love making school related layouts! From a crafting perspective, there are so many cute school related papers and embellishments that are so much fun to use, but more importantly, I think school related photos and layouts show the kids how much importance I place on their education.

Scrapbooking Tips:
I love layering stickers! I used Doodlebug Back to School paper pack and used the stickers from that collection. I adhered the stars directly onto my photos, but put foam adhesive on the back of the apple sticker. In the bottom photo I added foam adhesive to only the milk sticker.


This is the photo that broke my heart!

 Photography Tip:
I love that Dave liked to take pictures of what might seem like insignificant things - but here he zoomed in on Zach's lunch box and I love it! Otherwise I would have forgotten he had a LEGO Chima lunch box and backpack. He went through a phase where he loved this cartoon and LEGO characters. I had to include it on this layout because just looking at the picture made me smile and that is a sure sign that the photo needs to be included!


We Love Candy

Who doesn't love candy? My kids have inherited their mom's sweet tooth. Although, as I've matured I forgo the sour patch kids...